
Ember-Proofing Your Home: Vents, Gutters, and Roof Upgrades
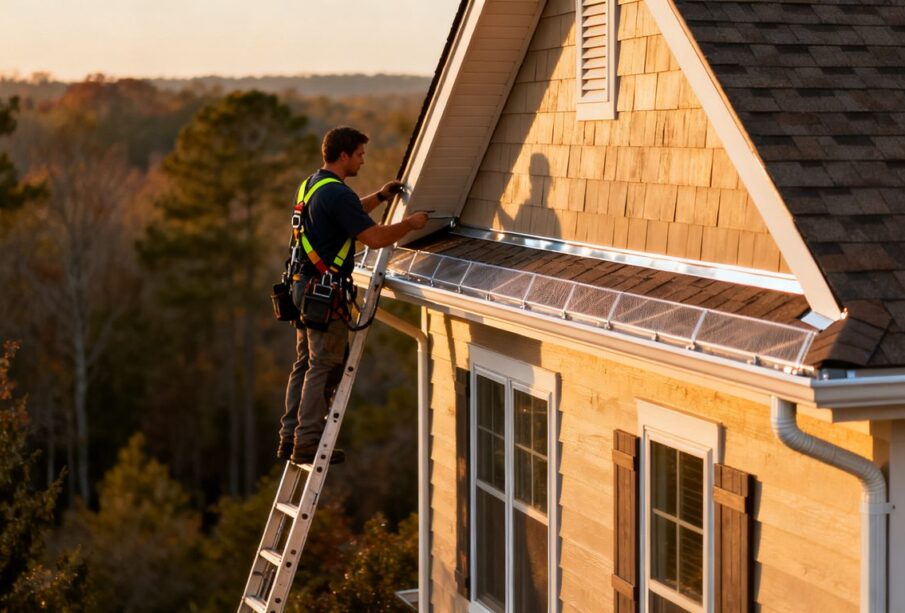
Wildfire embers can travel ahead of a fire and settle on roofs, in gutters, or near openings in the building envelope. A home does not need to be directly touched by flames to face ignition risk. The aim of ember-resistant improvements is to reduce the places where embers can lodge, enter, or ignite nearby materials.
How embers reach vents, roof edges, and other openings
Wind can carry embers toward attic and crawl-space vents, then push them through openings or against nearby surfaces. Gaps at roof edges, around flashing, and where utilities pass through the roof can also provide a route into concealed spaces. A vent must still provide the airflow required by the building, so simply covering an opening is not a safe substitute for an appropriate vent.
Which materials and debris are most likely to ignite
Dry leaves, pine needles, twigs, and other loose plant matter can catch embers, particularly when they collect against a roof, in a gutter, or beside a wall. Dry mulch and stored combustible materials near the house can add to the concern. Even a fire-resistant roof covering cannot remove ignition sources sitting on top of it or gathered at its edges.
How to spot vulnerable areas during a home inspection
A careful walk around the house can reveal where embers might collect or enter. From the ground, look for blocked vents, deteriorating screens, loose flashing, debris in gutters, and visible gaps beneath eaves. A short inspection checklist helps turn those observations into practical next steps:
- Note vent openings with damaged, missing, or visibly loose screening.
- Look for leaf and needle buildup in gutters, valleys, and roof-to-wall corners.
- Record gaps around chimneys, plumbing vents, and other roof penetrations.
- Check whether exposed wood or dry debris sits close to the home.
These observations are a starting point, not a substitute for a closer inspection where damage or hard-to-reach areas are involved. Photos and written notes can help a contractor understand which issues need attention first.
Choose and install ember resistant vents
Choosing ember resistant vents involves more than comparing the visible screen. The vent needs to suit the opening, provide the ventilation the home requires, and meet applicable local requirements. Product documentation and advice from a qualified professional can help homeowners compare options without guessing at compatibility.
Compare tested vent designs and screening options
Vent designs differ in their materials, construction, and intended locations. Some use smaller mesh openings to reduce the passage of embers, while other designs use additional features; the relevant details should be confirmed in the product documentation. The vent-selection guidance offers background on ember-resistant vent choices, but the right option still depends on the opening and local requirements.
Check vent size, location, and compatibility with existing openings
Before replacing a vent, confirm its dimensions and the type of opening it is intended to cover. A product designed for an eave, for example, may not be appropriate for a foundation or roof opening. BrandGuard vents include soffit, eave, gable, and foundation options designed to block embers while maintaining airflow; homeowners should verify the specific model’s fit and documentation for their project.
Seal gaps around vents without blocking required airflow
A well-fitted vent can still leave a vulnerable perimeter if the surrounding material is cracked, uneven, or deteriorated. Repairs should close unintended gaps around the frame without covering the vent’s intended airflow area. Preserve required airflow by confirming the repair detail with the product instructions or a qualified contractor rather than adding improvised sealant or screening.
Know when to retrofit or replace existing vents
An existing vent may be a candidate for retrofit if its frame is sound and a compatible, documented screening option is available. Replacement may be more suitable when the vent is corroded, loose, damaged, or poorly matched to the opening. EmberVent™ is designed to block wind-driven embers while allowing essential airflow; its documentation can help determine whether it fits a particular installation.
Reduce ignition risks in gutters and downspouts
Gutters can collect the same dry debris that embers may land on across a roof. Keeping them clear reduces that combustible buildup and also helps rainwater move toward the downspouts. These maintenance steps complement vent and roof improvements, but they do not make a home fireproof.
Remove leaves, needles, and other combustible debris
Leaves, needles, and small twigs should be removed from gutters before they dry into a dense layer. Debris can also gather where roof sections meet or behind gutter hangers, so cleaning only the visible front edge may miss material that remains lodged in place. Use safe access equipment and avoid working from a ladder in poor weather or without appropriate experience.
Evaluate gutter guards for ember and debris resistance
Gutter guards vary in their design and in how they handle fine debris. A guard should not be assumed to stop embers simply because it blocks larger leaves; homeowners should review its documentation and consider whether needles or other local debris can collect on or beneath it. The system should also allow inspection and cleaning when material accumulates.
Protect downspouts and clear blockages before fire season
Downspouts need to remain open so water and loose debris can move through the system. Check their inlets and outlets for leaves, nests, and other obstructions, and look for loose connections that could let debris collect at joints. Repairs should keep water draining away as intended without creating a new pocket for combustible material.
Set a practical schedule for inspections and cleaning
A useful schedule follows the home’s surroundings and seasonal conditions rather than relying on a single annual visit. Trees that shed heavily, nearby construction, and strong winds can all change how quickly debris builds up. After cleaning, a quick visual check from the ground can confirm that the gutters look clear, though it cannot replace a close inspection when blockages are suspected.
Upgrade the roof to resist ember exposure
A roof upgrade should address both the covering and the details that join it to other parts of the house. The condition of the existing roof, its fire-resistance rating, and the design of its edges all affect which repairs make sense. A qualified roofing professional can assess the assembly and identify details that are not safely visible from the ground.
Assess roof covering condition and fire-resistance rating
Look for cracked, loose, or missing roofing materials and signs of deterioration around the edges. Homeowners should check product records or consult a roofing professional to understand the roof covering’s fire-resistance rating rather than infer it from appearance alone. If replacement is being considered, compare the proposed material and installation details with applicable local requirements.
Check roof edges, ridges, valleys, and flashing for gaps
Edges and transitions can develop small openings as materials age, shift, or separate. Ridges, valleys, and flashing deserve attention because they bring different roof surfaces and components together. Repairs should fit the existing roof system and close unintended gaps without blocking drainage or ventilation paths that the assembly needs.
Protect roof penetrations such as chimneys and plumbing vents
Chimneys, plumbing vents, and other roof penetrations interrupt the roof covering and rely on correctly fitted flashing or other appropriate details. A homeowner can look for obvious lifting, corrosion, or missing material from a safe vantage point, but close assessment often requires professional access. Any work near a chimney should also respect its clearance and installation requirements.
Consider how roof upgrades affect the full roofing assembly
Changing one roof component can affect its connections to underlayment, flashing, ventilation, and adjacent materials. The contractor should explain how the proposed work fits into the existing assembly and whether related repairs are needed. BrandGuard offers sub-base and low-profile roof vent products designed to defend against embers while maintaining airflow; their suitability depends on the opening and the roof design.
Address vulnerable eaves and roof-to-wall connections
Eaves and roof-to-wall junctions can shelter debris and conceal gaps that are difficult to see from the ground. Improvements in these areas should account for both ember exposure and the home’s ventilation needs. A coordinated inspection can help avoid sealing an opening that serves an important function.
Inspect soffits, fascia, and exposed rafter tails
Look for damaged soffit panels, gaps along fascia, and exposed wood that appears cracked or deteriorated. Rafter tails and trim can create small ledges where debris gathers, especially beneath overhanging branches. BrandGuard offers soffit and eave vents designed to block embers while allowing airflow; the correct model and installation detail should be checked against the home’s existing openings.
Close gaps where embers could enter attic or roof cavities
Small openings at corners, joints, and transitions may connect directly to concealed roof or attic spaces. A contractor can determine whether a gap is an unintended opening or part of a designed ventilation path. Repairs should close the former while preserving the latter, with suitable materials and details for the location.
Choose materials suited to the home’s design and climate
Replacement materials should work with the home’s construction, exposure to weather, and existing finishes. Compatibility matters: a repair that performs well in one location may not be suited to a different roof edge or wall connection. Product instructions and local requirements can guide material selection, particularly where the repair affects ventilation or fire performance.
Keep attic ventilation effective after making upgrades
Attic ventilation should be considered as a system rather than a collection of isolated openings. Closing or modifying one vent may affect airflow elsewhere, and the appropriate approach varies with the roof design and climate. Before work begins, ask the contractor how the proposed ember-resistant changes will preserve the ventilation strategy required for the home.
Plan upgrades, verify requirements, and maintain protection
A manageable plan starts with the home’s actual condition rather than a long list of hypothetical improvements. Some issues, such as a damaged vent or substantial debris buildup, may call for prompt attention; others can be coordinated with planned roofing work. Local codes, permitting rules, and insurance terms can affect both the work and the products that are acceptable.
Prioritize repairs based on condition, exposure, and budget
Begin with visible damage, open gaps, blocked vents, and combustible debris that can be addressed safely. Next, consider areas with greater exposure, such as eaves beneath trees or roof edges where debris repeatedly collects. Grouping related work may help a homeowner plan costs, but essential repairs should not be delayed solely to bundle them with a larger project.
Confirm local codes, permitting rules, and insurance requirements
Requirements can differ by location and may change over time. Before selecting a vent or altering a roof, contact the local building department and review any applicable fire or building rules. Homeowners should also ask their insurer whether documentation, approved products, or particular maintenance records are relevant to their policy.
Hire qualified contractors and request product documentation
A qualified contractor should be able to describe the proposed work, explain how it fits the home’s design, and provide documentation for the products being installed. Homeowners can ask how airflow will be maintained and what inspections or permits are expected. Clear written scopes and product records make it easier to verify what was installed and plan future maintenance.
Reinspect vents, gutters, and roof details regularly
Protection can weaken as screens loosen, sealants age, roofing materials shift, or debris returns. Reinspect vents, gutters, downspouts, and visible roof details on a regular schedule and after significant weather or nearby work. When a concern is out of reach or unclear, a professional inspection is safer than attempting an uncertain repair.
Check Out These Guides


